
Seed Sowing 102
Starting Seeds Indoors, Then Pricking Out and Potting On
This guide follows my first tutorial, Seed Sowing 101, which focused on sowing seeds directly in the garden: plop a seed in the exact place it will grow and leave it there. If you missed that guide, you can read the full instructions here.
In Seed Sowing 102, I’m covering a slightly more advanced method: starting seeds indoors in trays, then “pricking out” and potting on the seedlings once they grow.
To be perfectly frank, I learned this method from the BBC’s Gardeners' World. It has worked like a dream since I started growing plants from seed about six years ago. So consider this my attempt to translate the method into US English (cue dad joke groan).
I love this approach for several reasons. One big one is germination rate. Not every seed sprouts, and when you sow seeds in trays (rather than individual cells), any seed that wants to grow has the chance to do so. Seeds that fail don’t waste soil, pots, or space.
There’s also some emerging research suggesting that plants benefit from growing near each other, especially early in life. Seed trays allow seedlings to grow close together at first. When they start to need more room (teenage years), we separate them and move them into their own pots.
That said, if there are seven ways to skin a cat, there are at least a baker’s dozen ways to start seeds indoors. Read different methods, experiment, and find the one that works best for you.
So let’s get into it.
Pricking Out and Potting On
This tutorial comes at a good time because it’s that time of year.
Supplies
Seed trays with drainage holesExample: shallow trays designed for seed starting (like these). Avoid trays without holes or heavy-duty propagation trays meant to hold pots. Even old takeout containers work well, just drill a few holes for drainage.
Peat-free seed-starting soil
Small nursery pots. Roughly 3–4 inch pots work well.
Peat-free potting soil
Labels
A warm indoor growing space. This could be:
a south-facing windowsill (west-facing is okay, too)
a greenhouse or cold frame
a grow light setup indoors
Heat mats or propagation domes can help if you’re starting seeds in a cooler space.
Water source You’ll be watering regularly, so make sure you have a good setup.
Drainage solution. If you’re starting seeds indoors, think about where excess water will go. Seed trays should not sit in standing water.
Method: Starting Seeds in Trays
Many steps are similar to direct sowing until we reach the pricking-out stage.
1. Determine Your Planting Time
The key to starting seeds indoors successfully is knowing your average last frost date.
We can’t predict the exact date each year, but historical averages give us a good estimate.
Here in Evanston, Illinois, the average last frost date is early May.
So if a seed packet says:
Sow indoors 6–8 weeks before last frost → sow in early to mid-March
Sow indoors 4–6 weeks before last frost → sow mid- to late March or early April
You can estimate your last frost date here.
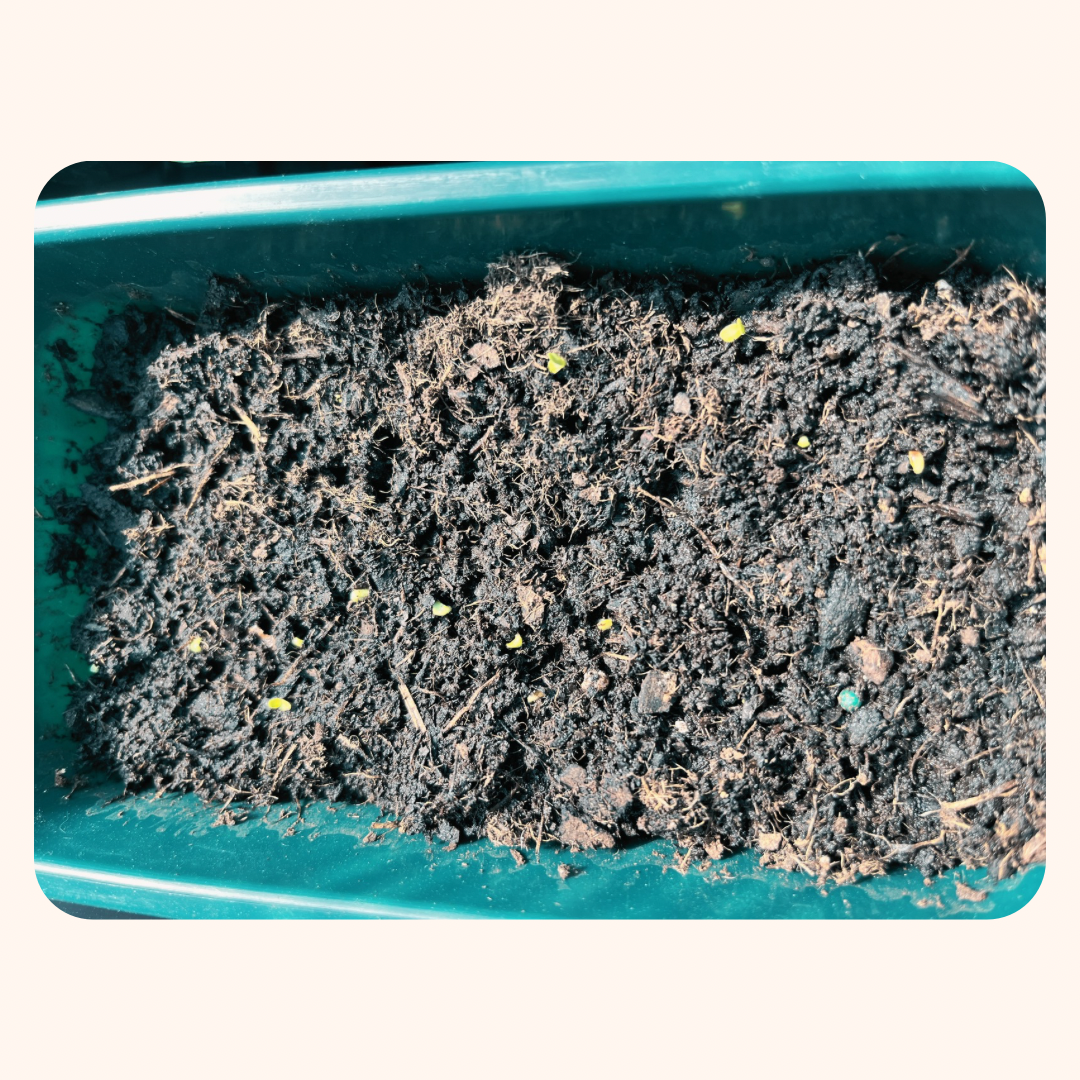
2. Fill the Seed Tray
Fill your tray with peat-free seed-starting mix, stopping about half an inch below the rim. Give the tray a tap on the table so the soil settles in.
3. Sow the Seeds
Pour a small pile of seeds into your palm and gently sprinkle them across the soil surface.
Try not to go too heavy-handed. You’ll end up with too many seedlings to separate later.
Different seeds have different needs, so always read the seed packet to determine planting depth:
Do not cover: Seeds need light to germinate. Leave them on the surface but gently press them into the soil so they don’t move around. I use the bottom of another seed tray for pressing.
Barely cover (~⅛ inch): Lightly sprinkle soil over the seeds and press gently.
Lightly cover (⅛–¼ inch): Add a thin but noticeable layer of soil and press gently.
For larger seeds like sweet peas, calendula, or cosmos, I usually sow them directly into cells or small pots since they need deeper planting.
4. Water Gently and Regularly
Water the tray carefully. Use:
a hose set to mist or shower, or
a watering can witha shower head attachment.
You can also bottom water by placing the tray in a shallow bath of water so moisture absorbs from below. This is especially helpful for tiny seeds that could dislodge easily with an overhead watering.
Keep the soil evenly moist but not soggy. Good drainage is critical. Seedlings should never sit in standing water.
5. Label and Place
Label everything including the sowing date. Your future self will thank you.
Place the trays in their indoor growing space. They’ll stay there for several weeks.
6. Practice Patience
Now we wait.
While they sit, nestled in their cozy spots, some actual magic will happen. A small speck of nature will decide that it’s ready to make its way in the world. The speck will emit roots and then a wee shoot of green. These will grow long and strong; the speck has accomplished so much already.
(I hope you read that in David Attenborough’s voice).
When you see the green shoot pop out of the soil, do not hold back your squeal of excitement. I love that this feeling still happens after years of seed sowing.
Though it is magic, it is slow. The seed packet will give an estimate of when the seed will germinate. But even when the shoots pop up, we still have to wait for the “true leaves” to appear before taking our next step.
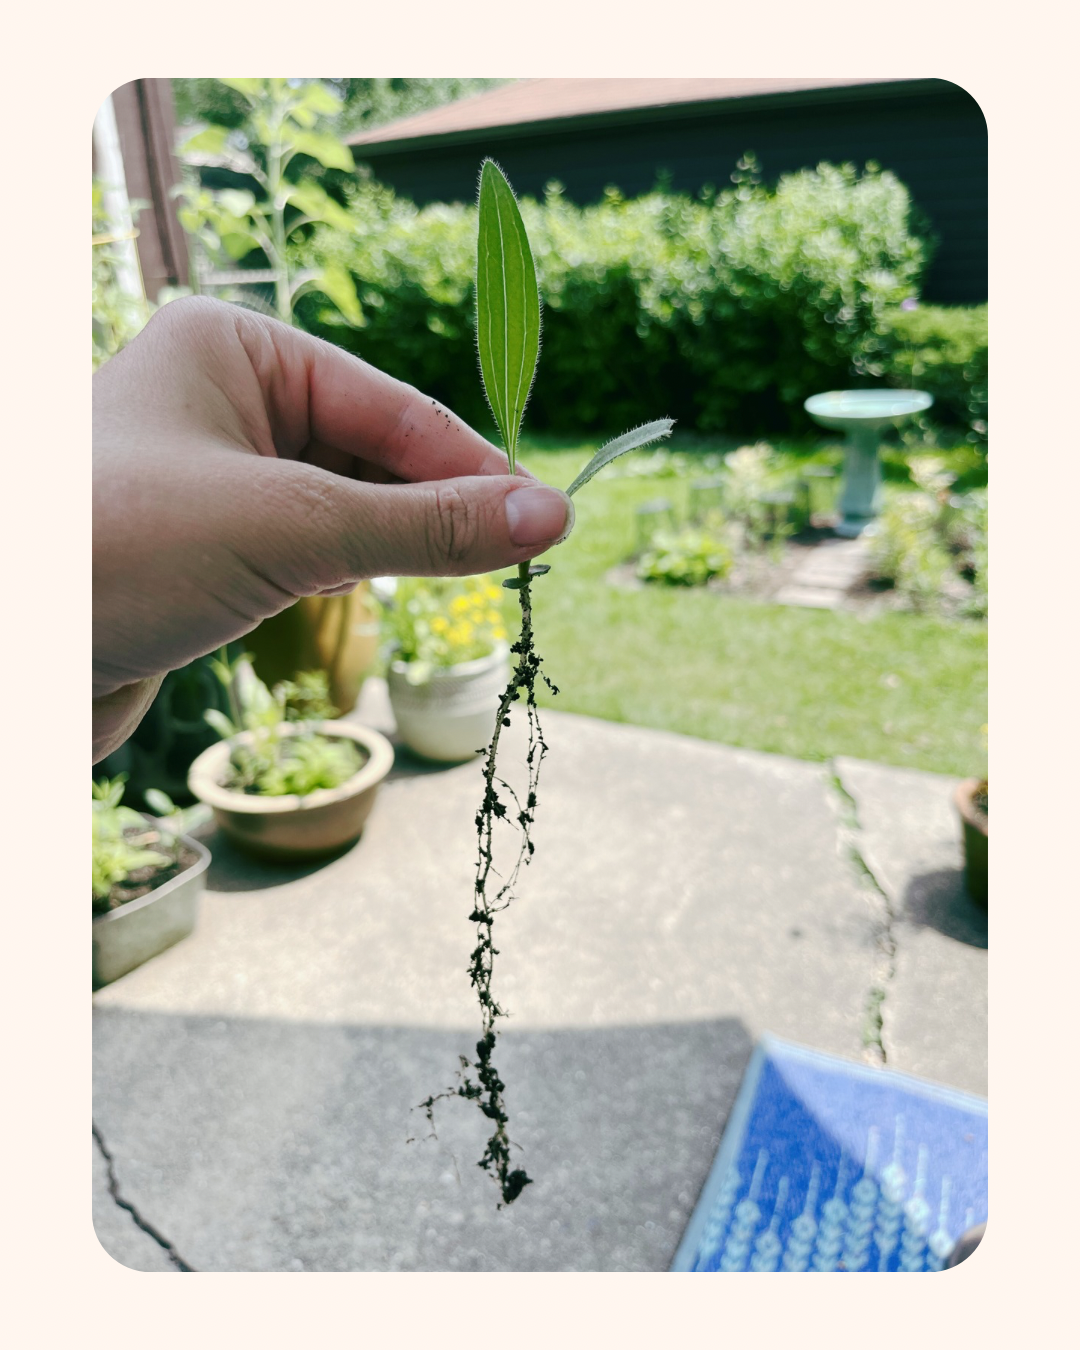
The first leaves you see are cotyledons, also known as seed leaves. These feed the young plant while it establishes itself.
It’s important not to disturb the plant until the next set of leaves come, these are the true leaves. At that point, they are strong enough for a transition.
This brings us - finally - to the all important namesake of this method: pricking out and potting on.
7. Pricking Out and Potting On
Prepare enough nursery pots with peat-free potting soil, one pot for each seedling you plan to transplant. Ten seedlings? Ten pots.
Fill each pot, leaving about half an inch at the top. Use your finger to create a hole in the center, a seedling will go in there.
Keep extra potting soil nearby, this will be used to fill in around the seedling as needed.
This can feel quite daunting at first, but be bold. It might take a few goes to find your stride. Just remember that the plants want to live; they are more forgiving than you think.
Method 1: The Careful Approach
Use a chopstick or a similarly thin and strong poke-y device
Gently insert it into the seed tray soil near a seedling. Angle underneath the roots and slowly lift.
Hold the seedling by the seed leaf, not the stem or a true leaf, to help encourage it out.
Place the seedling into the prepared pot. Add soil around it until the roots are fully covered.
Tap the pot gently on the table to settle the soil around the roots. Avoid pressing down too firmly, which can damage delicate roots.
Water thoroughly and ensure good drainage.
Method 2: The Impatient Gardener Approach
If I’m being honest, I got too impatient with the chopstick method. It’s a good way to start, but it’s not my jam.
Now, instead of lifting seedlings one at a time, I remove the entire soil block from the tray and gently pull apart the seedlings with my fingers.
So much less fiddly (for me, and maybe you!)
Now what?
Now that the plant has been potted on, we get to wait again! Keep them indoors until we’re safely past the last frost date. Now that the plant has more room to grow, it will take advantage of the space and really take off. They’ll start to grow more quickly and vigorously.
Eventually they will outgrow those pots. At that point you can either:
Pot them on again into larger containers, or
Plant them outside in the garden
If planting outdoors, you’ll need to harden off the seedlings first.
This means gradually exposing them to outdoor conditions over one to two weeks. Bring them outside for increasing periods each day until they can stay outside overnight.
Then they’re ready for their final home in the garden.
In the end…
As I mentioned earlier, this is just one of many seed-starting methods.
I like it because I can start a large number of seeds in a very small space. The seeds that germinate can graduate to larger pots.
If I use a plug tray or cells or even small pots, I’m using up a lot of space and soil for seeds that might not germinate. Giving myself more room means I can sow more of other varieties.
A couple of other seed-starting techniques I’d still like to try:
The snail method
Handheld soil blocking
Whatever process you choose, I hope you enjoy it.
Once you get the hang of it, starting seeds indoors becomes one of the most exciting parts of the growing year. It’s meditative, you get your hands in the dirt, and watching tiny plants grow is hella satisfying.
Small joys are the best joys.
Happy sowing, y’all.