
Seed Sowing 101
I won’t say it’s an addiction, I will say it’s hard to stop once you start…
The other day, I threatened a couple of golfers at work that if they kept talking to me about golf, I’d start talking to them about gardening. It definitely worked, but they seemed to be under the delusion that I’d talk about fertilizer. Nothing against good fertilizer but, ew, no. It would be about seed sowing, duh.
If I found a willing listener, I could talk about seed sowing for days. And for good reason: every single time a seedling pops up, I experience undiluted joy. It never gets old, even after all these years.
It’s also a serious cost saver you can buy seeds and soil for the price of a single plant these days.
PLUS, the variety! Garden centers are great, but the options are….what everyone else is getting. Shopping for seeds means you can find more exciting plants that really speak to you.
There’s a Method to it
My journey with seed sowing started with pure ignorance. I literally bought a few seed packets and emptied them straight onto the ground. I might as well have dug my cash directly into the soil; though, to be fair, seeds aren’t that expensive. In hindsight, I now know this method is called broadcasting. But there’s a strategy to it that I was completely unaware of.
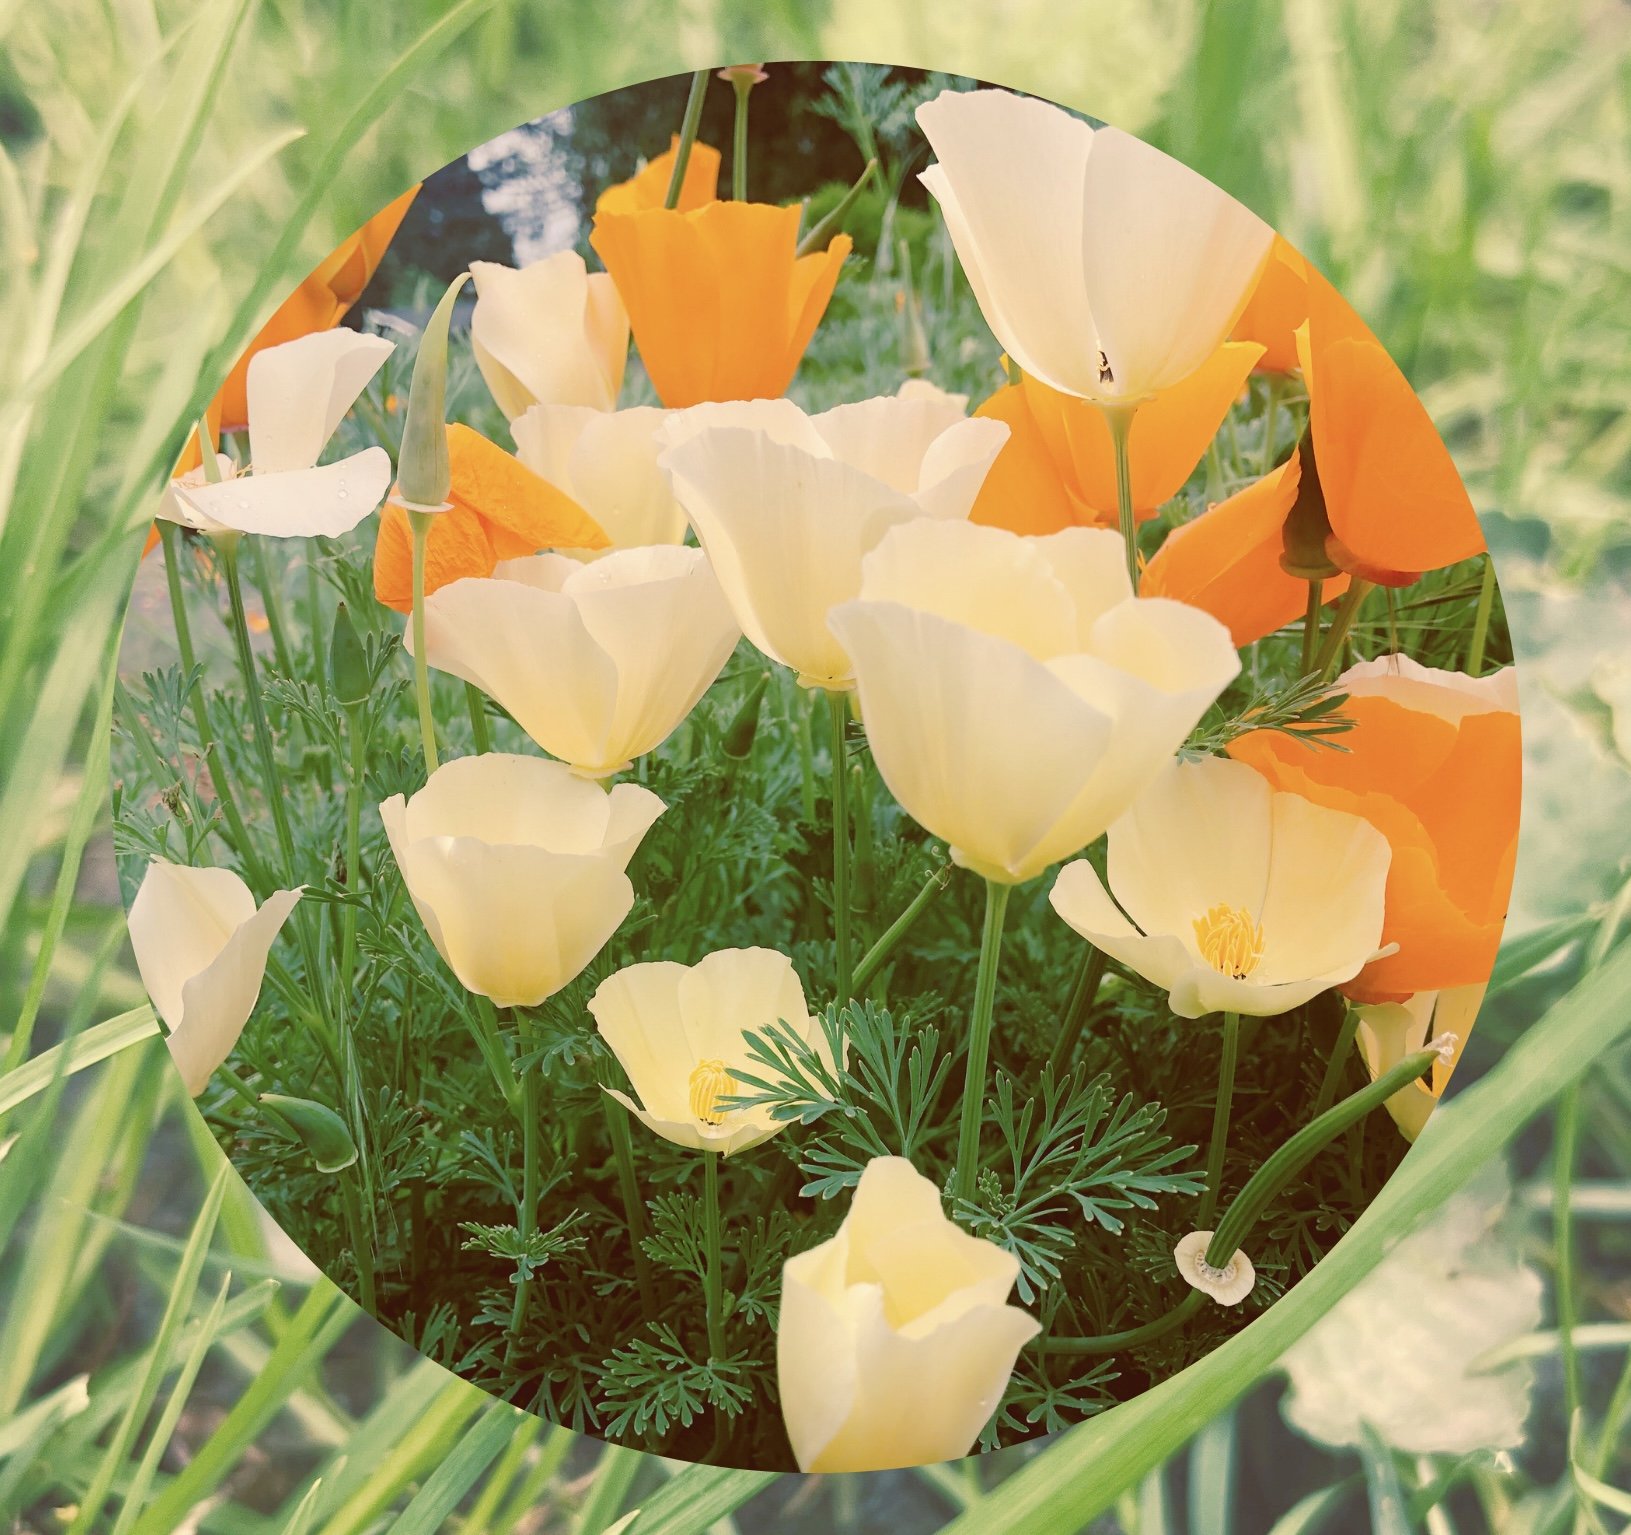
The only thing that popped up was California Poppy. And it continued popping up prolifically every year after that. Incidentally, my first lesson in sowing was also my first lesson in the brutality of gardening. I hacked those suckers back dramatically every year to keep them under control. But man, they put on a real show from late spring to mid summer.
My next sowing experiment involved Zinnias. I plopped a single seed in a small pot on my back patio. I was so proud when one sad little flower came….and went. Nutritious soil, multiple sowings, and regular watering were considered only quasi-important back then.
Learning the Basics
It really wasn’t until I started watching BBC’s Gardener’s World that I learned there was a methodology to seed sowing. Like, who knew that sowing depth was a thing? Or that you can thin seedlings. Or that timing matters. Or that you can (and often should) start seeds in a different spot than they’ll ultimately grow.
Yes, I could go on ad nauseum about seed sowing, but I won’t put you through that. In this post, we’re keeping it simple with the basics: the direct sow method.
You Only Need Three Things:
1. A container with a hole in the bottom.
With the direct sow method, the pot you sow into is the same pot the plant will grow up in. Terra cotta or ceramic pots work great. You could also repurpose a coffee tin or an old take out container, but be sure to add drainage holes. Drainage is key
If you plan to go whole hog on this, you can also sow directly into raised beds (obvi, no hole needed there).
2. Soil.
For the seeds I’m recommending here, regular potting soil works just fine. We prefer peat-free options for environmental reasons. (More advanced methods may require seed-starting mix.)
3. Seeds. Here are few plant options that benefit from being sown directly:
Veggies: Chard, Lettuce, Cilantro
Flowers: Nasturtium, Poppies, Calendula, Love-In-A-Mist, Sunflowers (if your pot is big enough)
Go to your nearby garden center for seeds (even in winter). Otherwise, my favorite seed suppliers are: Kitchen Garden Seeds, Nichols Garden Nursery, Select Seeds, Prairie Moon Nursery (good for more advance seed sowing), Seed Savers Exchange
Did you get your supplies? Great! Let’s dig in.
What does “Direct Sow” Mean?
To sow direct simply means planting seeds directly into the location they’ll grow to maturity. They won’t be started elsewhere and transplanted later.
In Seeding Sowing 102, we’ll cover starting seeds indoors and “pricking out and potting on”.
How to Direct Sow Seeds
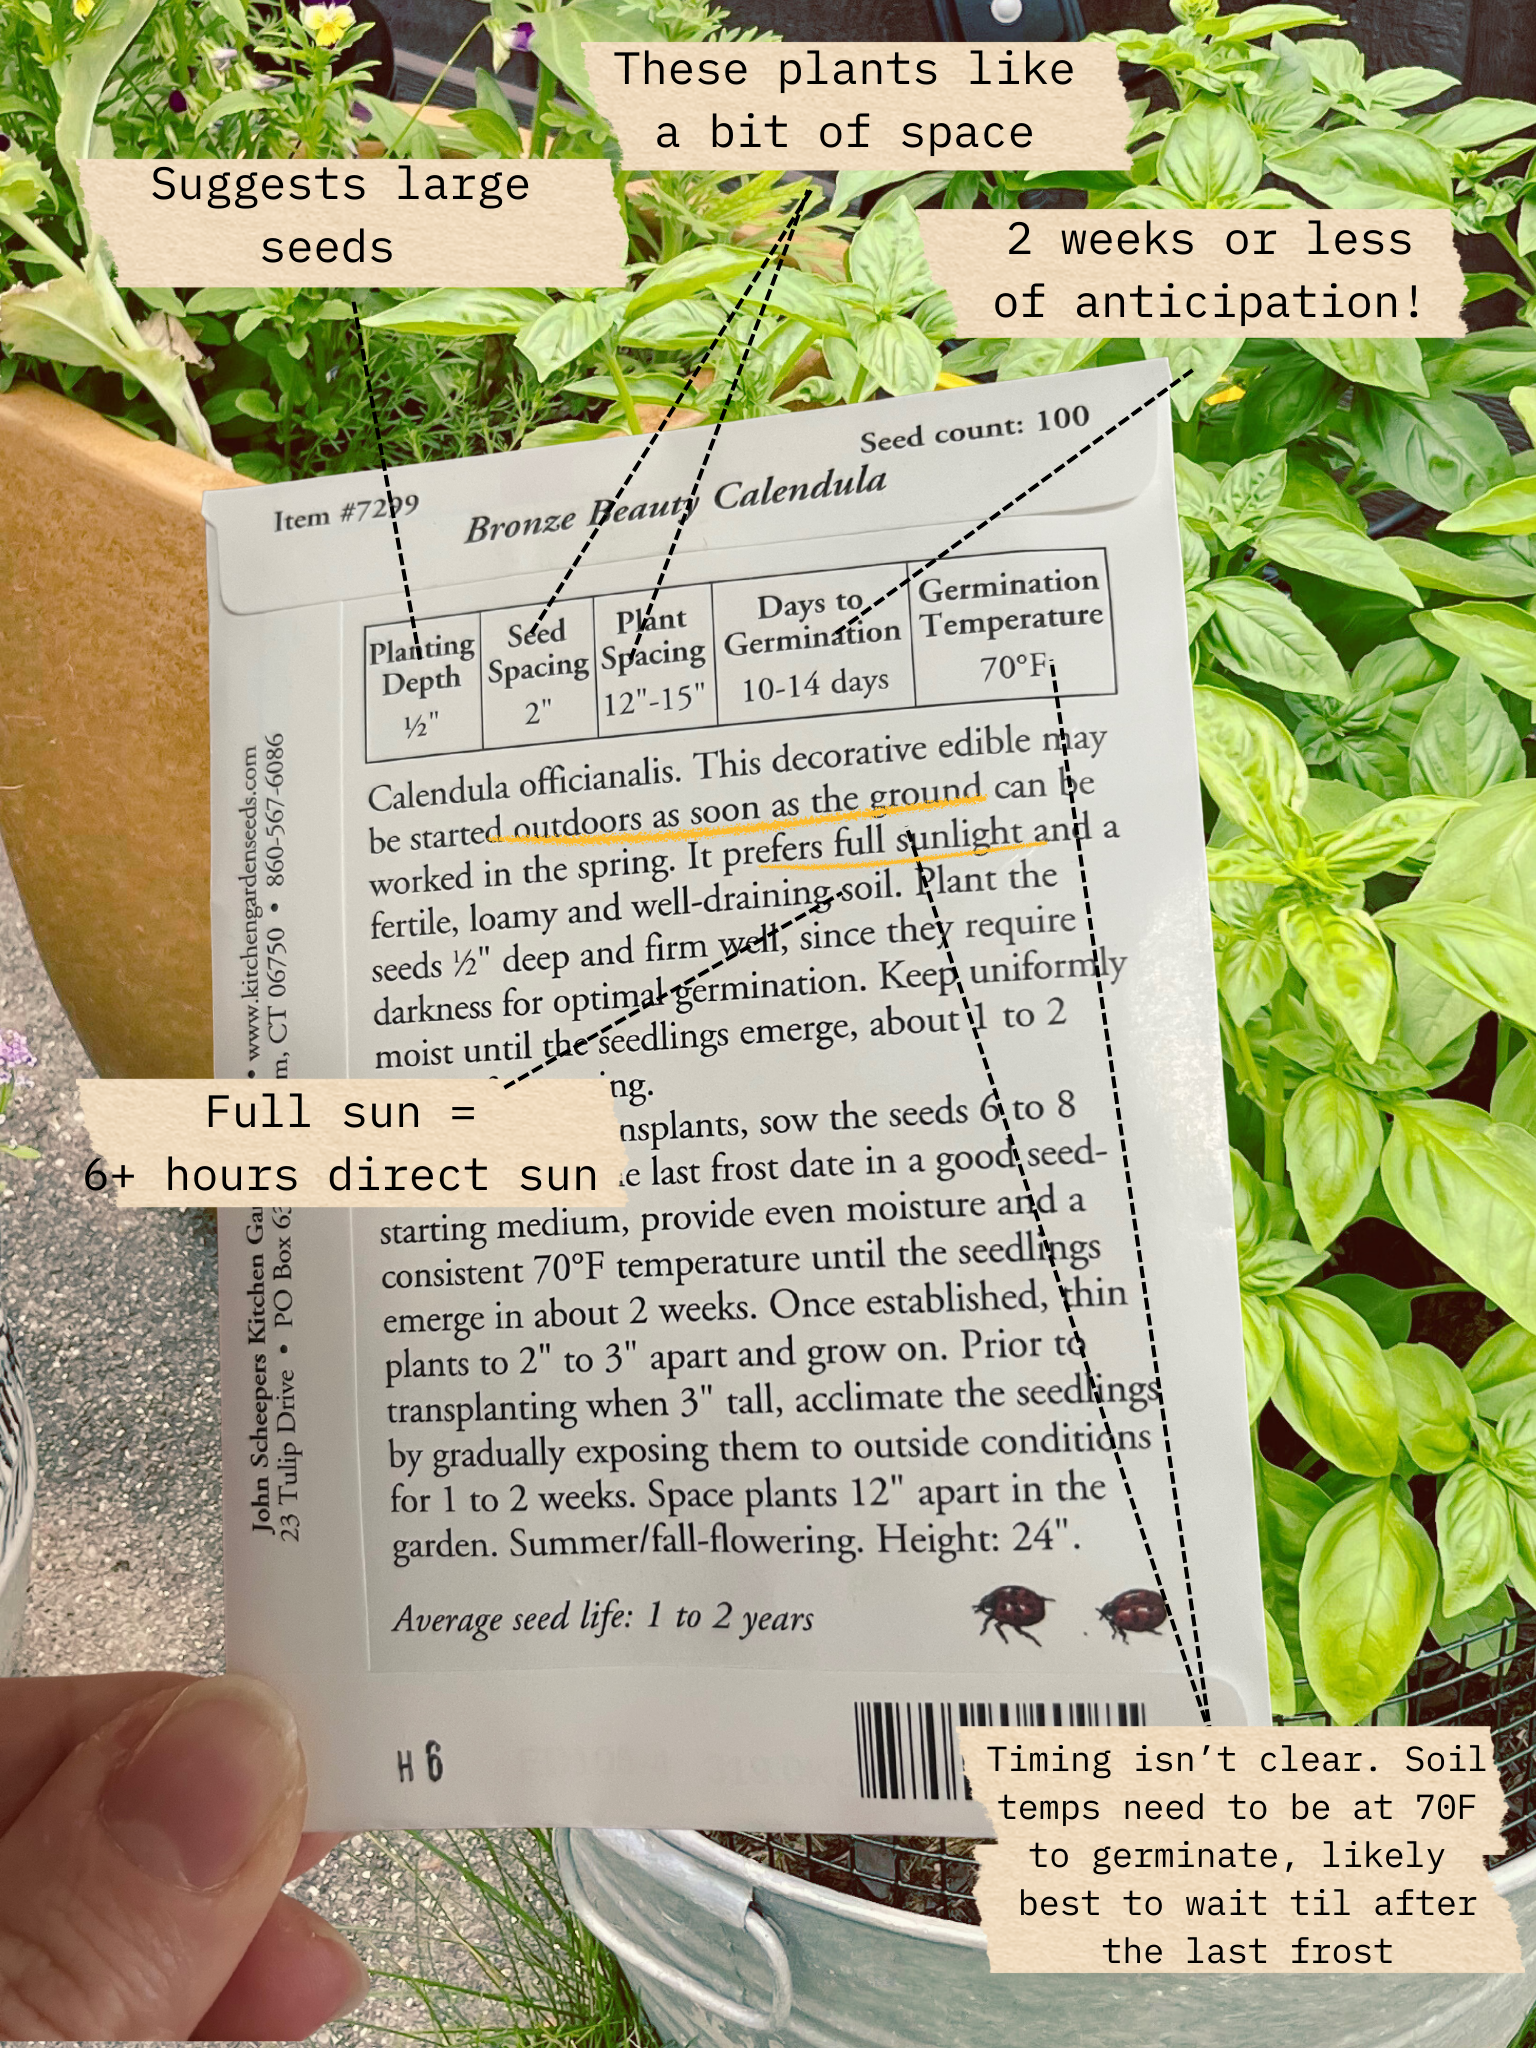
When you cook, you’re supposed to read the entire recipe before you start. It’s the same thing with a seed packet. That said, a recipe will assume you already know basics like chopping, sauteing, and folding in cheese. A seed packet will also make assumptions on your knowledge. Let’s break it down.
You don’t need to take notes, scroll down for a free cheat sheet…
1. Determine your planting time
The key is knowing your last frost date.
Let’s be clear that this is impossible to predict exactly. However, we can make an estimate based on historical averages.
Here In Evanston, IL, we have an average last frost date of early-May. So:
If my packet says “sow direct early to mid-spring, just before the last frost,” I aim for mid to late April.
If it says, “after all danger of frost has passed,” I’d wait for the second or third week of May.
The Farmer’s Almanac is a great place to estimate your last first date.
2. Fill your Container
Fill your pot with soil, stopping about an inch below the rim. This allows the water to pool and thoroughly soak the soil as it drains out the bottom.
3. Determine the planting depth
The packet will tell you the planting depth. But a general rule of thumb: plant seed at a depth that’s twice its size…
A ⅛” seed → plant it ¼” deep. Make little planting holes with a dibber, chopsticks, or a pencil tip, if needed.
Tiny, dust-like seed → sow on the surface and barely cover with soil or simply press in.
4. Decide how many seeds to sow
Always sow more than you need, but not too many. Let’s find the sweet spot:
Take nasturtium. They sprawl; a single plant will cover a lot of ground. But consider that some seeds will not germinate. In a small pot, I’ll sow three seeds about an inch apart in a triangle. In a large pot, I’ll sow several triangle groups about a foot apart.
When the seeds start to pop up, consider thinning out, aka enact Social Darwinism. Pull out the weaker seedlings so stronger ones have more room to grow. That said, I believe plants benefit from having a friend, so I’d leave two.
Poppies are different. These take up space vertically rather than horizontally, so I can sow more densely. I like a jam-packed pot and will thin out later if needed.
The seed packet will give spacing guidelines. Ultimately, use your best judgment. Remember this is all an experiment, learn from it and try it again!
5. Get excited as you open your seed packet!
Pour out the seeds in your palm. All the seeds I’ve recommended are large enough to handle easily. Chard and nasturtium seeds, for example, are big enough to sow one at a time. Poppy seeds can be sprinkled in small pinches (think Salt Bae?).
6. Cover, Press, and Water.
Cover seeds according to the packet’s guide. If it says “barely cover,” sprinkle lightly with soil.
Gently press the soil with something flat. The goal here is to bring the seeds in good contact with the soil and if they’re barely covered, it helps keep them in place.
Water gently! Lets not use high pressure and undo your careful work. But do give them a good soak.
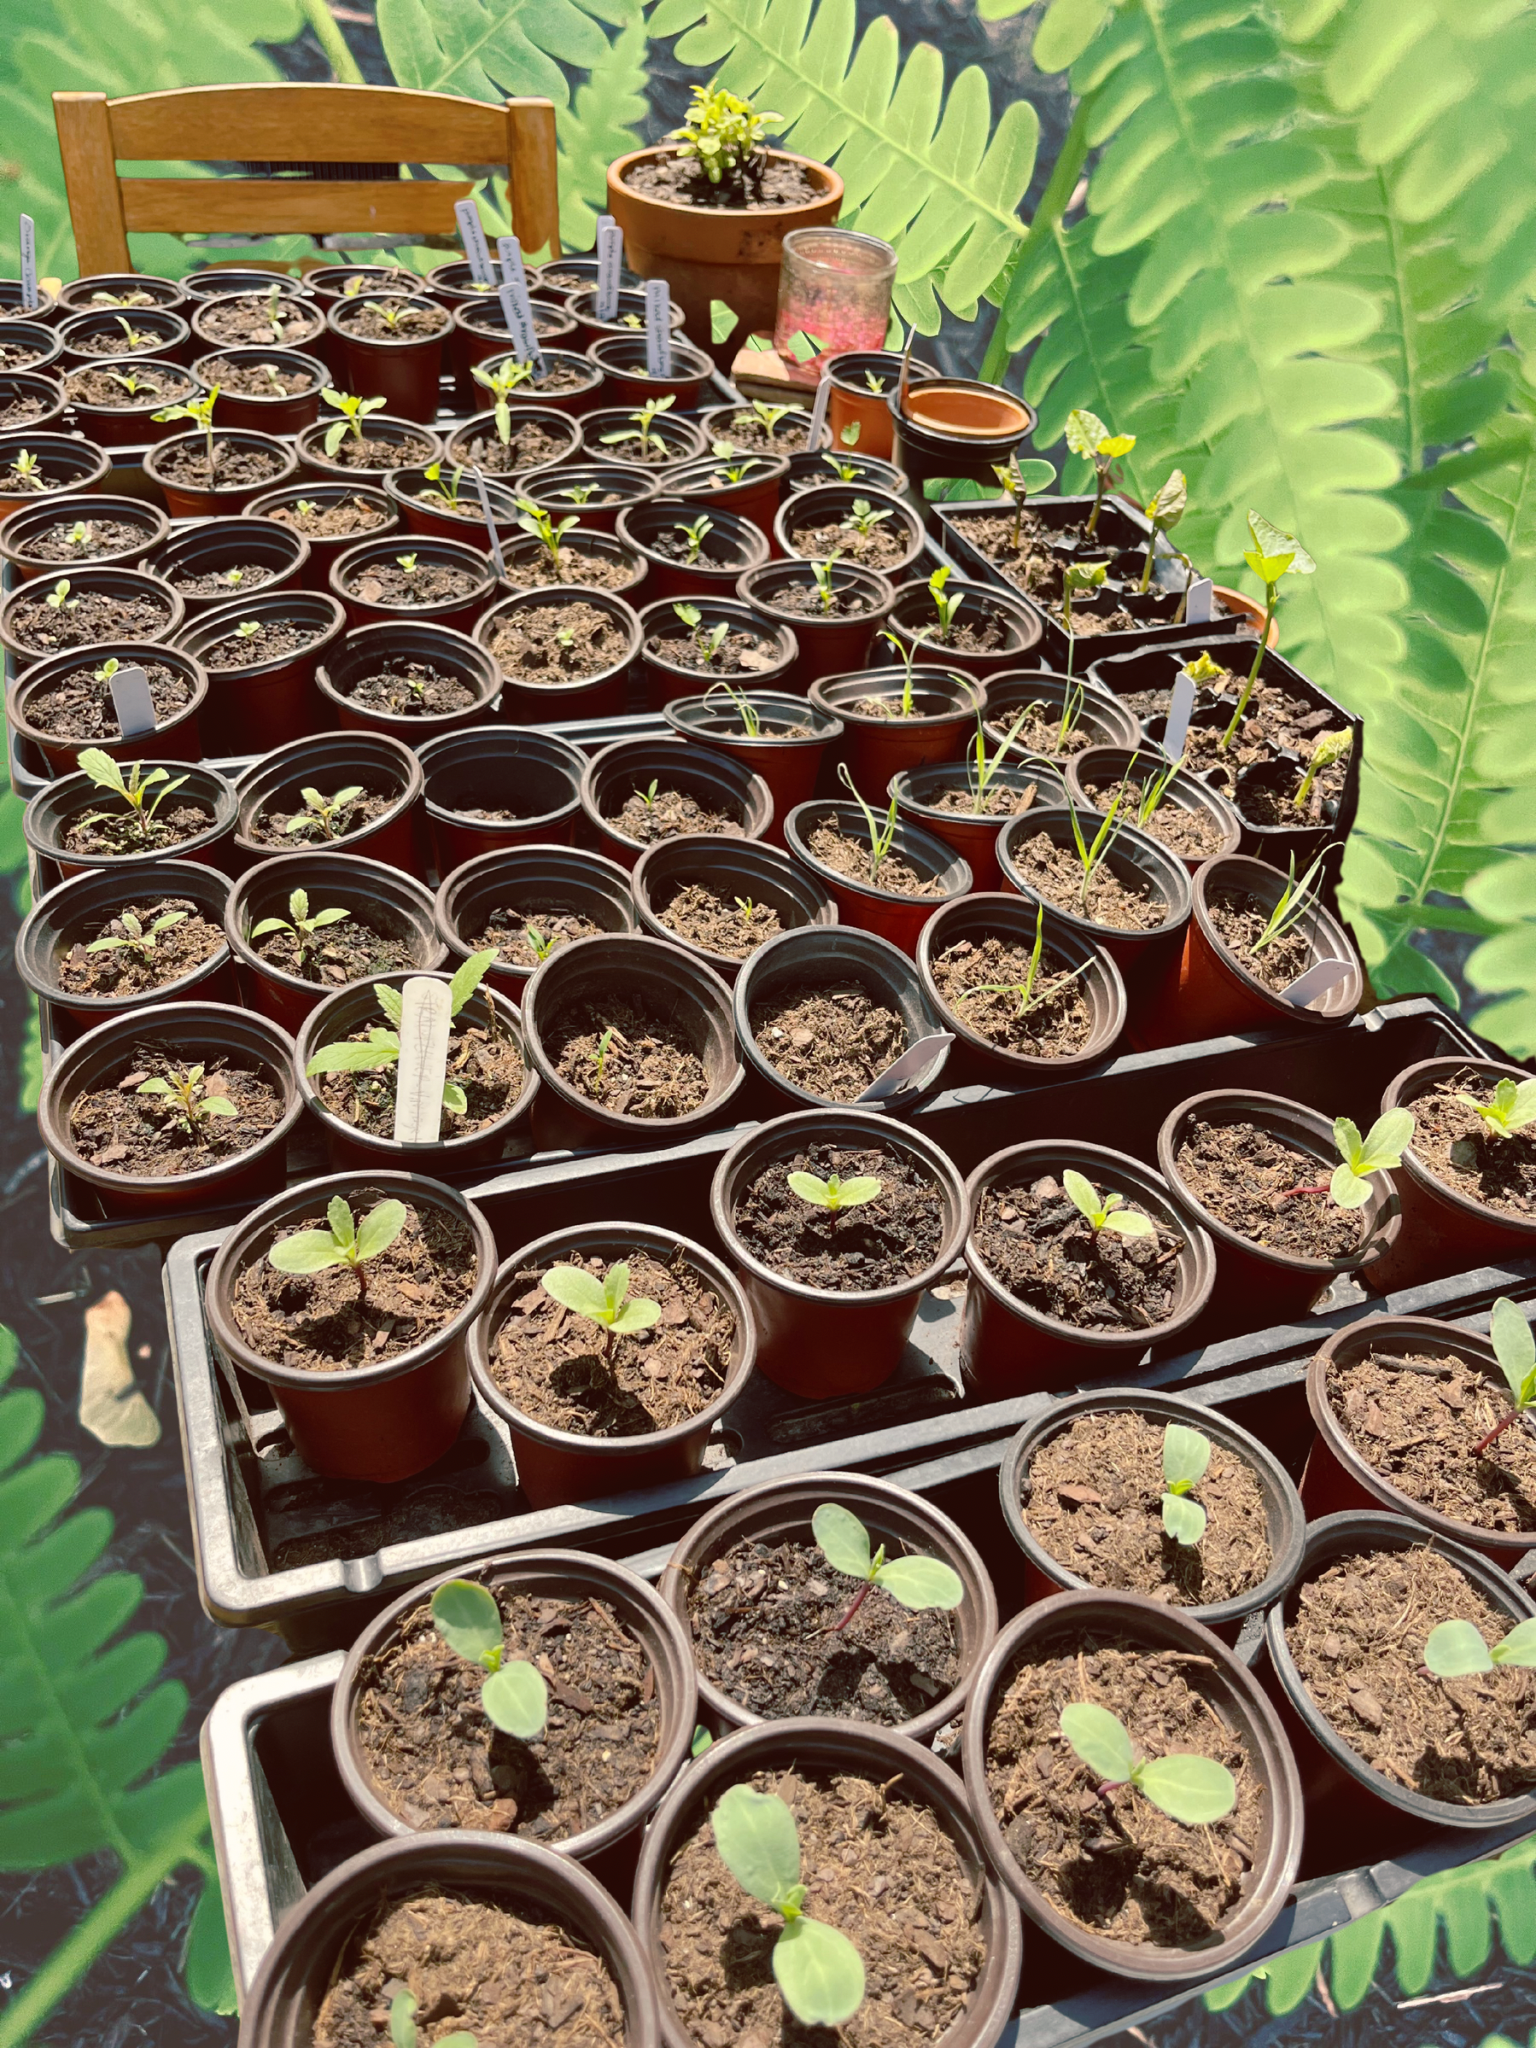
7. Label and Place.
Label everything, your future self will thank you.
Place your container according to light needs. Check your packet!
Full sun = at least 6 hours of direct sun.
Part sun/part shade = 4-6 hours of direct sun.
Shade = less than 4 hours of direct sun.
Keep an eye on the soil, stick a finger in every day to determine moisture levels. If it feels dry, water it. If you have good drainage (roots aren’t sitting in wetness), it can’t hurt to water every day or two, especially in hot weather.
8. Feed! Once the plants start shooting up stems and getting well established, start giving them an all-purpose liquid fertilizer about once a week. Potting soil will lose nutrients over time (unlike the Earth’s magical soil), thus the need for fertilizer.
I created a handy cheat sheet to take with you while you sow
The Waiting Game
The hard part - if you can call it that - is done! Next, you get to wait with anxious anticipation while your seeds do their thing.
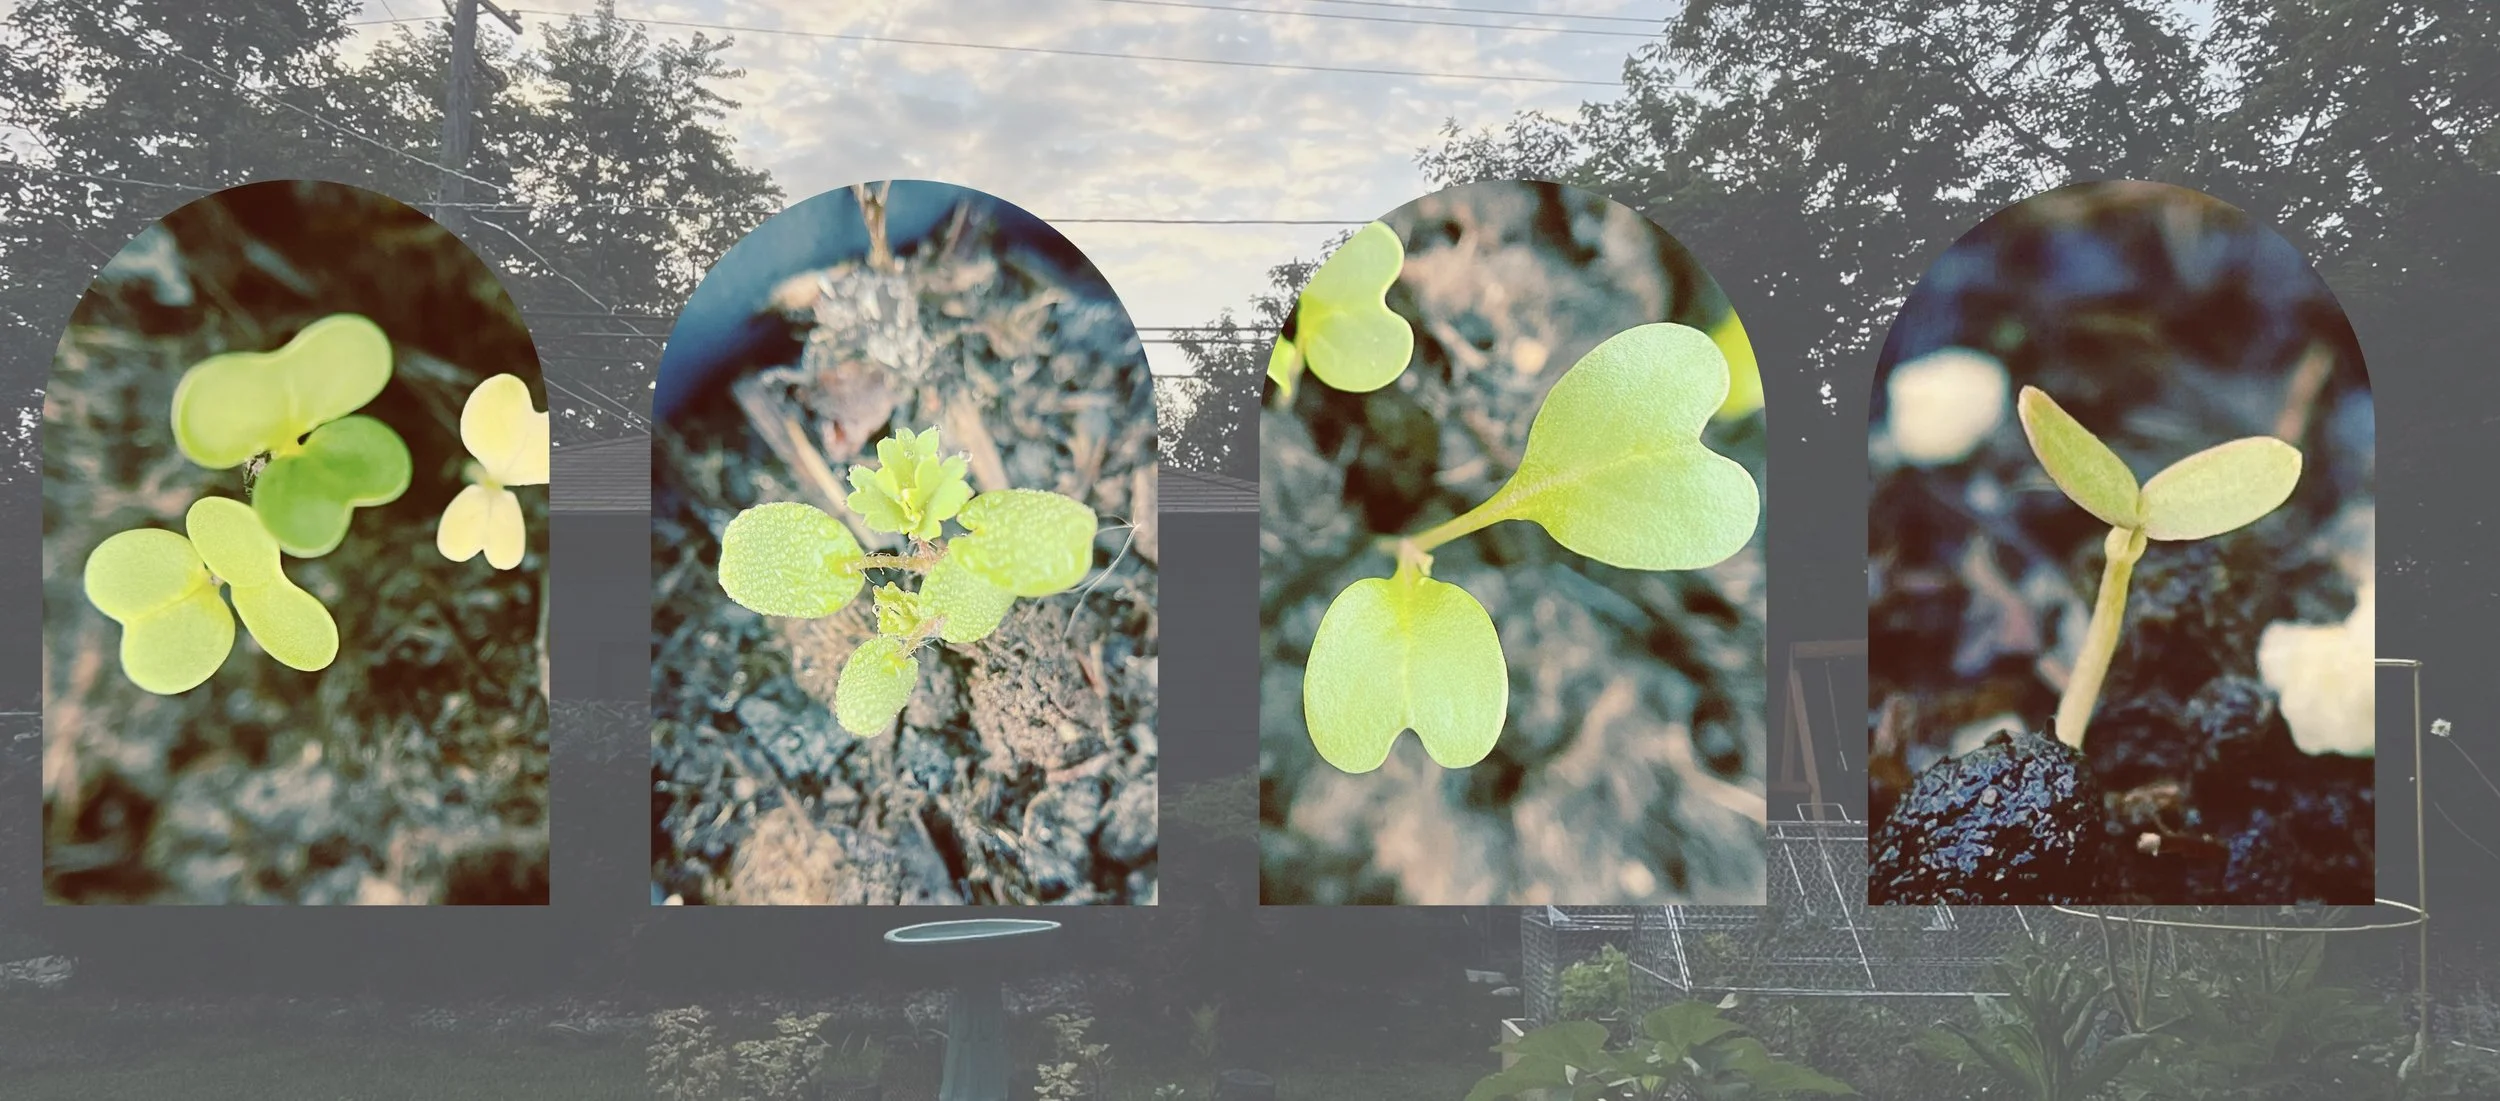
Is it working? Did I do it right? Our ‘instant gratification’ culture will really test you here. Most of these seeds will sprout in about 1-2 weeks. I know you’ll check every day.
When you see the first seedling, don’t be surprised if an actual squeal escapes your lips. One always does for me. Once you get the hang of this process, it becomes really meditative and easy.
This process is utter joy for me, I hope it is for you too. Cheers to getting your feet wet in seed sowing and hopefully growing some roots, too!
Happy sowing!